Have you ever seen those fantastic resin art pieces and wondered how they’re made? Well, wonder no more! In this blog post, we’ll teach you how to make your very own resin art piece. It’s a great DIY project for beginners, and the results are stunning. So read on to learn all you need to know about making resin art. Then get creative and start making your masterpiece!
What you’ll need
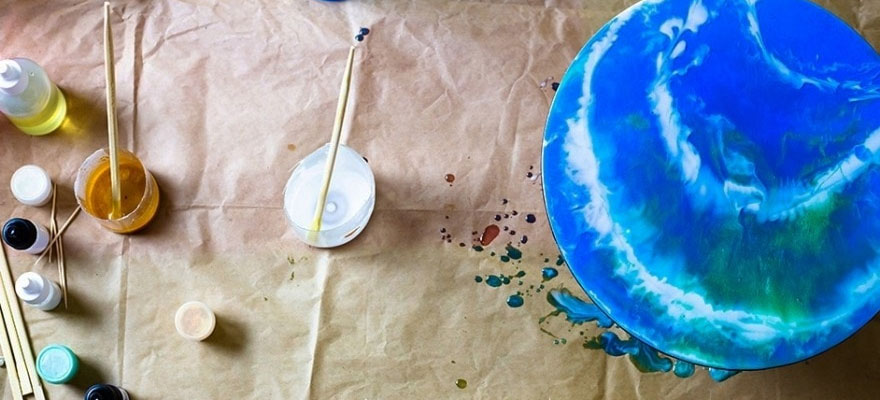
- Resin (we recommend ArtResin).
- Hardener.
- Mixing cup and stir stick.
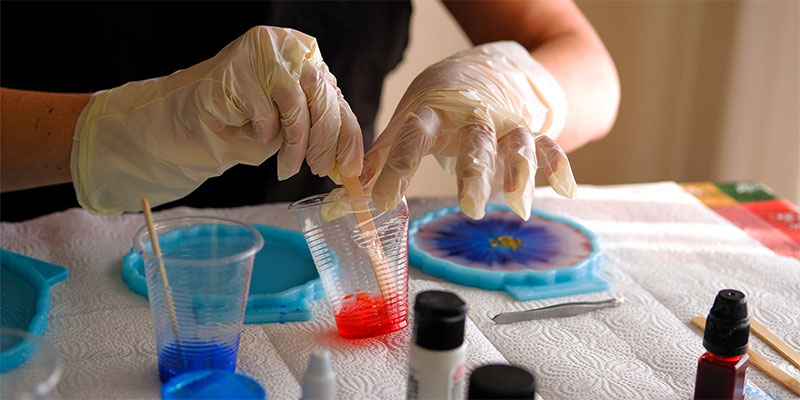
- Gloves.
- Protective eyewear.
- Ventilation mask.
- Disposable cups or containers for mixing colors (optional).
Instructions
- Begin by mixing your resin and hardener in the mixing cup, according to the manufacturer’s instructions. Mixing the two ingredients together thoroughly is essential; otherwise, your resin will not cure properly.
- Once the resin is mixed, you can begin adding color if desired. To do this, add a few drops of resin coloring to your mixing cup and stir well. You can also use alcohol inks or mica powders to add color to your resin. If you’re using multiple colors, be sure to mix each one separately in a disposable cup before adding it to your main mixture.
- Once you’re happy with the color of your resin, it’s time to start pouring it into your mold or onto your work surface. If you’re using a mold, pour slowly and evenly so that the resin doesn’t overflow. You can also use silicone molds, making removing your finished piece a breeze.
- If you’re not using a mold, you can pour your resin onto a flat surface like a piece of glass or acrylic. You can also use wood, but be aware that the resin will soak into the wood’s pores and may cause it to warp over time.
- Once your resin is poured, use a popsicle stick or other tool to create swirls or other exciting designs. You can also add glitter, beads, or other embellishments at this stage. We recommend using the heat gun for resin art if you use two colors. Just heat the first color so that it hardens a little, and then continue to create.
- Now, it’s time to let your resin piece cure. This process can take anywhere from 24 to 48 hours, depending on your resin. Once your piece is cured, it will be stiff, glossy, and ready to admire!.
So there you have it – a simple guide to making your resin art. Get creative and have fun with this project – the possibilities are endless! And be sure to share your finished pieces with us on social media – we can’t wait to see what you create!